How to Set up Remote Desktop Access on the Host Computer (Mac)
You can remotely access/control one Mac computer from the other by enabling and using a built-in Screen Sharing feature. You will need to have an account and password on both Macs. If one of the Mac computers is located off-campus, you will need to first connect to TXST VPN.
On the on-campus/office Mac computer, enable Screen Sharing as follows:
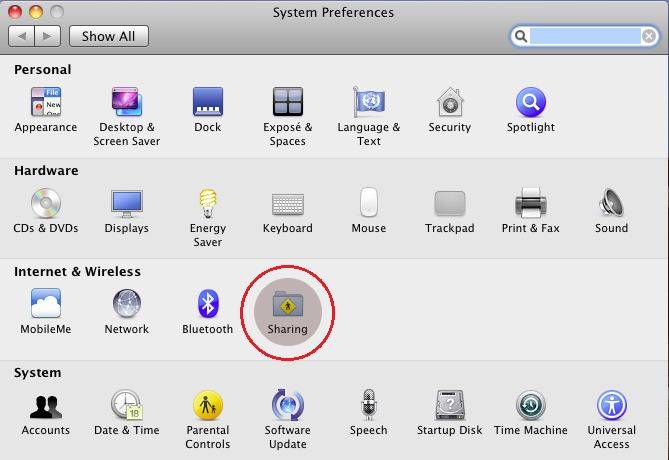
- From Apple menu, click System Preferences...
- Click the Sharing icon.
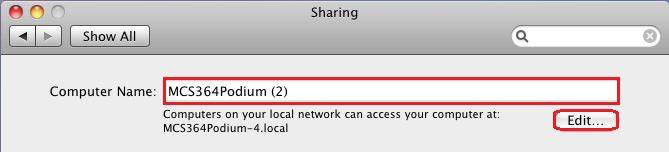
- Note the Computer Name at the top of the Sharing pane. It should be in tag number of the Mac as in tagxxxxxx.
- If it is not, change the Computer Name to the tag number and restart the Mac. Return to the Sharing pane of System Preferences.
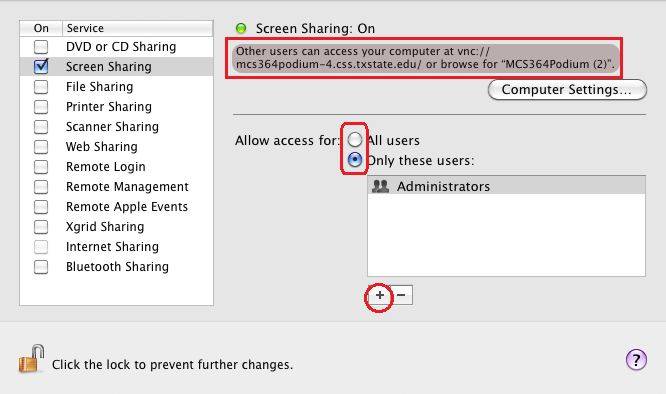
- Check the option Screen Sharing.
To the right of the Screen Sharing text, the status icon should now be green status
- Note the address of the computer listed in the text in the status area. It will be something like vnc://tagxxxxxx.jck.txstate.edu
- In the Allow access for section, click All users or switch to Only these users and click the + button to add the users.