

How to Generate a CSR for SSL Certificates on Windows
Get Started
If you are requesting a certificate for an application or server that runs Internet Information Services (IIS) on a Windows server in the Texas State data center, you may request that ITAC set up the certificate for you. In this case, please include this request in the CSR field of the Secure Sockets Layer (SSL) Certificate Request.
NOTE: ITAC cannot set up the certificate if it is application-based or uses Tomcat or Apache certifications.
Method 1 - Automatic
These instructions will generate a certificate automatically on a TXST-hosted Microsoft Windows Server running IIS (Internet Information Services) without having to use a request form.
At any time, you may submit a service request to have an IIS certificate automatically generated. Please note that Apache and Tomcat are not supported for automation and require Method 2 for manual signing.
NOTE: All domain names specified must be valid DNS records that resolve to the server you’re running certbot on.
EXAMPLE: webfiles.txstate.edu can request a certificate for webfiles.txst.edu, but not www.txst.edu.
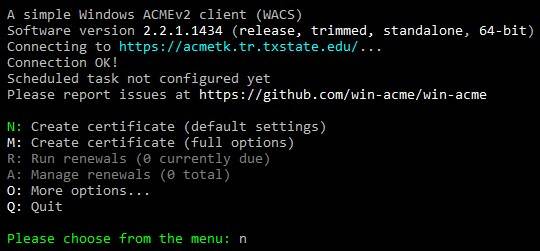
- Open the command line as administrator
- Navigate to the win-acme directory below:
Cd C:\TXSTSysOps\win-acme
- Type wacs.exe and hit the enter key.
- Select n for Create Certificate.
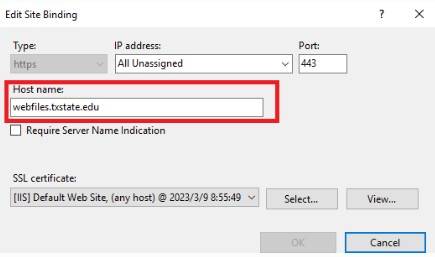
- Select the IIS website you wish to automate. For this example, we used 1.

NOTE: If the host name field in the IIS binding is empty, then this list will not populate.
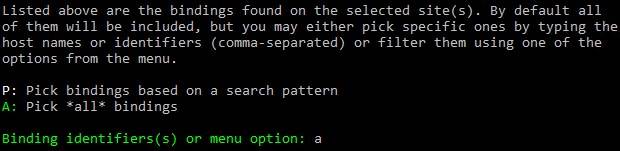
- Select all bindings using menu option A.
- Continue with the selection by entering yes.

- Enter yes to open in default application, then enter yes if you agree to the terms of service.
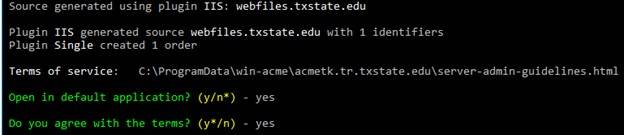
- Enter the TXST email address(es) to be notified about any problems with the certificate automation.
Method 2 - Manual
- Launch the Server Manager.
- Click Tools and select Internet Information Services (IIS) Manager.
- In the Connections tab, click the server name for which you want to generate the CSR.
- Double-click Server Certificates.
- Click on the Actions tab and then click Create Certificate Request....
- Enter the following Distinguished Name Properties, and then click Next.
NOTE: The following characters are not accepted when entering information:< > ~ ! @ # $ % ^ * / \ ( ) ? &Common Name — The fully-qualified domain name (FQDN) — or URL — for which you plan to use your certificate (the area of your site you want customers to connect to using SSL).
NOTE: An SSL certificate issued for www.coolexample.com is not valid for secure.coolexample.com. If you want your SSL to cover secure.coolexample.com, make sure the common name submitted in the CSR is secure.coolexample.com.
- In the Organization field, enter Texas State University.
- In the Organizational Unit field, leave this field blank.
- In the City/Locality, enter San Marcos.
- In the State/Province field, enter Texas.
- In the Country field, enter US.
- For the Cryptographic service provider field, click Microsoft RSA SChannel Cryptographic Provider.
- For the Bit Length field, click 2048 or higher, and click Next.
- Click …, enter the location and file name for your CSR, and then click Finish.
- Open the CSR file you just saved and use the contents of this file as your CSR Request.