

Scanning Documents
Scanning Documents to a Batch
- On the right side, click the application needed.
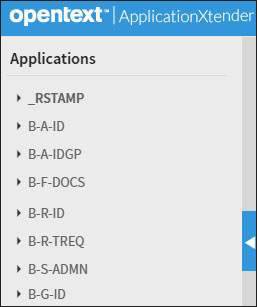
- Click New Batch.

The ApplicationXtender Web Access (BDMS) screen with the option to scan a document will display.
TIP: Get your paper stacks ready and be sure to remove all staples.
- Place pages in the scanner, face down, top down.
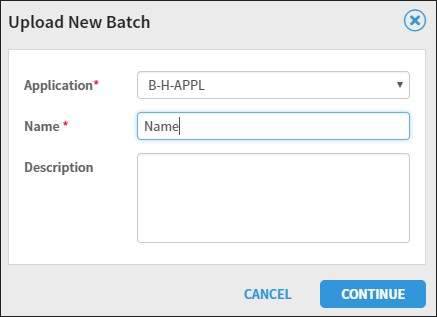
- Next to Name, enter the document name, and click Continue.
NOTE: The scanner version covered here is the Canon DR-3010C. The functionality is similar for all models, but may be organized differently in the tabs.
Select the Scanner
NOTE: If the scanner button is greyed out, you must select a scanner. If you have already selected a scanner and the button is still greyed out, ensure the scanner is on and ready.
If the Scanner does not appear on the list, ensure there are no other BDMS windows open. Once a window is open that could be using the scanner (even if it is not currently using it), the scanner may not be available in another window.
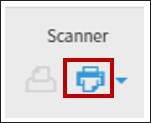
- Click Select Scanner.
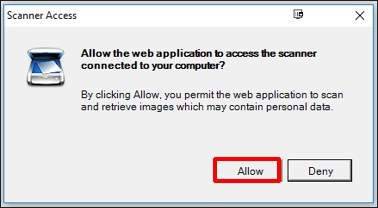
A Scanner Access pop-up module will appear.
- Click Allow.
The program will access your scanner drivers.
- Click the ISIS: Canon DR-3010C, and click OK.
NOTE: If that option is not available, do not scan. Contact ITAC and report a missing scanner driver.
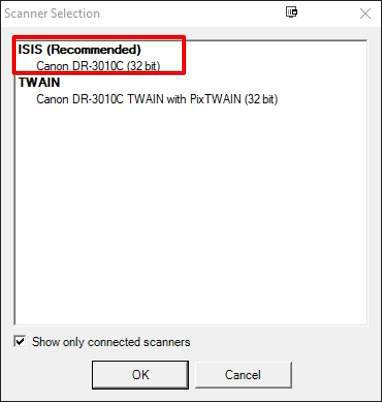
If the display only includes the WIA:[model] option or TWAIN, notify the BDMS Administrator immediately. Do not use this option.
There is software to be installed on your computer that will ensure the ISIS:[model] driver is available. WIA and TWAIN drivers do not provide the desired compression for scanned documents.
Settings for ALL Scanned Images
Color Format, Simplex Duplex, Paper Size and Resolution

Landscape Pages
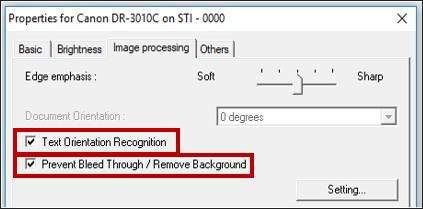
- If there are pages in landscape format, click the Advanced Settings icon.

- Click the Image Processing tab.
- Click the checkbox next to Text Orientation Recognition
- Click the checkbox next to Prevent Bleed Through / Remove Background.
Settings for Different Types of Images
Black and White Pages
- To change your settings, next to the Scanner Setup button, click the drop-down box.
- Click the Advanced Settings (gear) icon.

- Next to Mode, click Black and White.
- Next to Page Size, click Letter.
- Next to Deskew, click the checkbox.

NOTES:
- If the form is an NCR form or other form with light text, use Advanced Text Enhancement II.
- Choose the Page Size of legal if needed.
- Check the Deskew option so pages are as straight as possible.
TIP: NEVER USE THE GRAY SCALE OPTION! These make files extremely large.
Pages of Various Colors
If the paper is a light pastel color, Black and White settings will likely work. For vivid colors, use the settings above for black and white and set a Color Dropout.
CAUTION: Before you choose to use a Color Dropout, check the page closely. For example, if you are scanning bright pink pages and use a Color Dropout of red, ensure there is no red ink on the paper copy.
- To change your settings, click the drop-down box next to the Scanner Setup button.

- Click the Advanced Settings (gear) icon.

- Click the Image Processing tab.
- In the Color drop out section, click the paper color you wish to scan from the menu.
- Click OK.
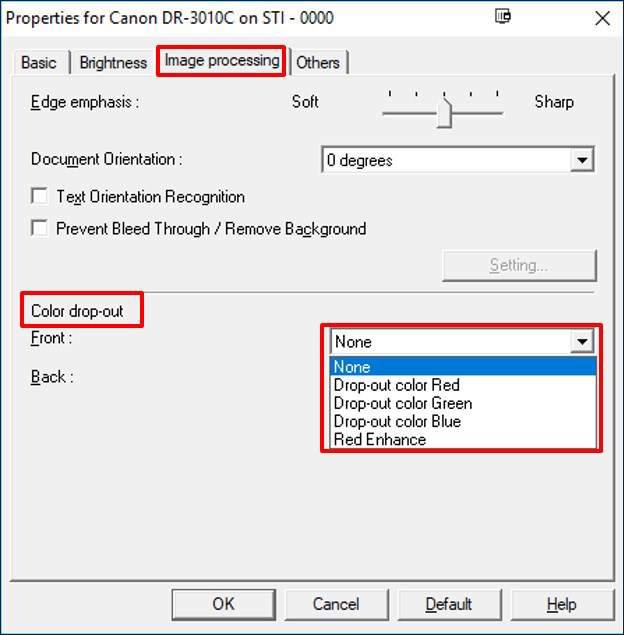
TIP: For purple, try red and then blue to see which will work best for the color paper you are scanning.
Inspect the Image
Inspect the image of the page as noted above even more carefully than usual, especially for ink that is the color which you have selected for drop-out.
Saving Settings for Future Use
Once you have all the settings you need for a particular type of page, you can save the settings and eliminate the risk of forgetting a setting next time you need to scan a similar document.
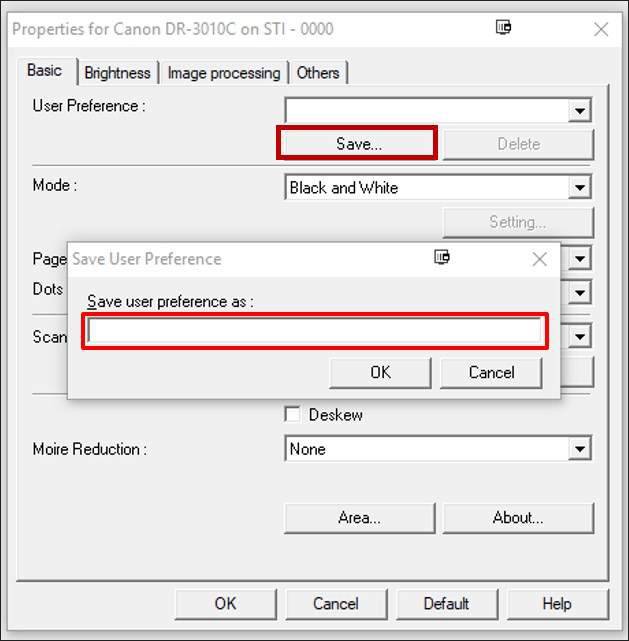
- Click Scanner Setup, then Advanced Settings.
- Click the Basic tab, and click Save.
The Save User Preference screen opens. - Enter a descriptive name.
Examples: Black and white simplex, pink adv form, blue request form, or green application.
TIP: Make sure to include the color of the form if that is the purpose of saving the settings.
- Click OK.
The settings are saved under the name you specified.
NOTE: This option saves only for the person who is logged onto the computer. Each person will need to save their own. On new scanners, you can also save profiles.
Used Saved Settings: Black and White Duplex
- Click the Advanced Settings Basic tab.
- in the User Preference selection, click the drop-down box, and click the desired option.
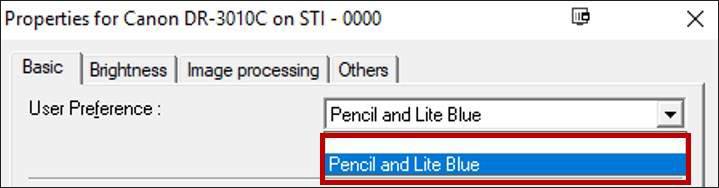
- Click OK and begin scanning.
TIP: Always check your scanner settings before you begin scanning. Often, the settings from the last scan are still in place. Look at all the settings to ensure that they are correct for the batch that you are about to scan.
Scan the Pages
- Insert pages into the scanner, top down, face down.
- Click the Scan icon.
The pages will be scanned and display on the screen.

Inspect the Pages
After the last page is scanned, the image of the last page will remain onscreen. Move to the first page and begin inspecting your scans.
Look at each image in its entirety, top edge to bottom edge and left edge to right edge, comparing the image to the paper version to ensure the image is a true and accurate representation of the original. Ensure that nothing has been omitted on the image, especially if using a color drop-out.
For example, if you are scanning bright blue pages and use Color Dropout of blue, ensure there is no blue ink on the paper copy. If present on the page, it is not likely to be on the image.
CAUTION: These instructions are not permission to shred or otherwise destroy any document. Destruction of the document should not be considered unless the scanned image is a true and accurate representation of the original. Standard retention and destruction policies apply.
Moving through the pages / Zooming the images (Windows)
To move between pages, click Next Page.
![]()
Use any of the following buttons to inspect an image, including the Zoom In or Zoom Out.
|
Fit to Window |
Fit Vertically |
Fit Horizontally |
Zoom In |
Zoom Out |
Re-scan Pages as Needed, Deleting Bad Images
- If you find an image that is not acceptable, delete the bad image.
- Change the scanner settings as needed and scan the page(s) again.
The new image will now be the last document in the batch. Place the paper document accordingly in your stack or make notes as to the correct location.