

How to Remove Roles from a User by NetID in Role Management
Searching for the User
- Use the User Search box to search for the user by NetID.
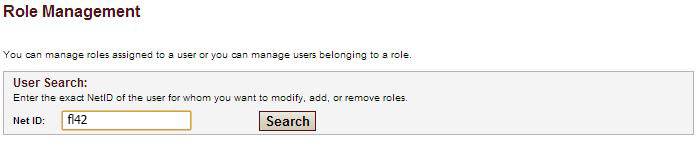
- After the search is completed, you will see all information about the user including:
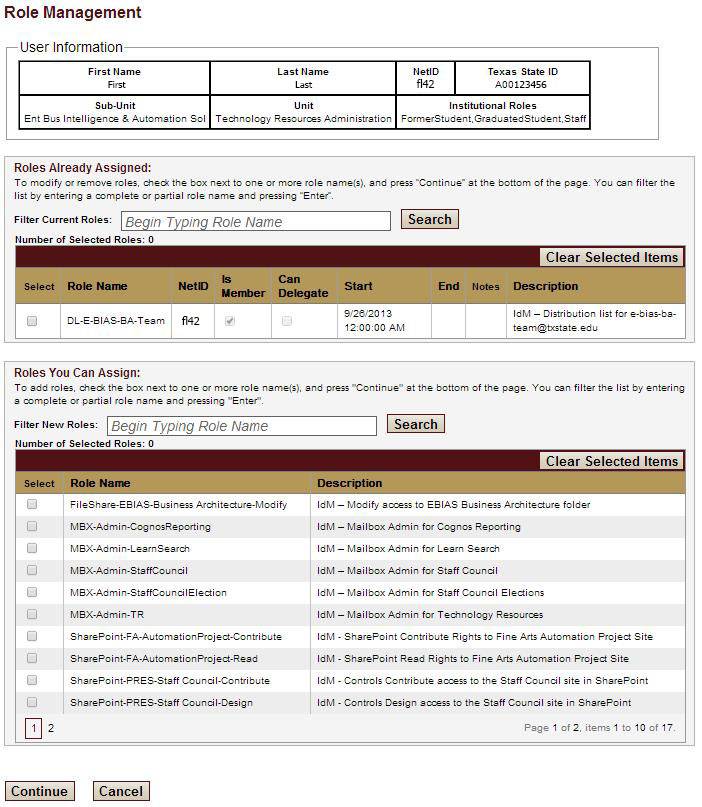
- User Information - basic information about the User, including: First Name & Last Name, NetID, Texas State ID (Banner ID), Sub-Unit, Unit, and Institutional Roles
- Roles Already Assigned - if the user already has roles assigned to them, you can modify the roles by first clicking on the Select box, and then clicking on Continue at the bottom of the page.
- Roles You Can Assign - these are the roles that are open for you to assign to the user. You can use the Filter New Roles box to look for specific roles.
Removing the Role from a User
- To remove a user role check the Select boxes for the role or roles you wish to select in the Roles You Can Assign. After the Roles are selected, click Continue.
- In the Role Management Options window, click the Remove User From Role checkbox at the bottom right of the screen.
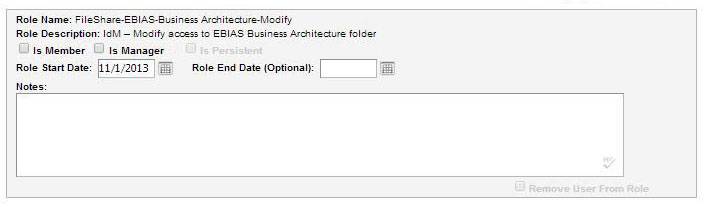
Additionally, you can set the Start and End Date for the role. If the user will only need the role for a specific frame of time, use the calendar to select the dates.
In the Notes section you can write a note to remind you why the change was made. - Click Continue to save the changes.
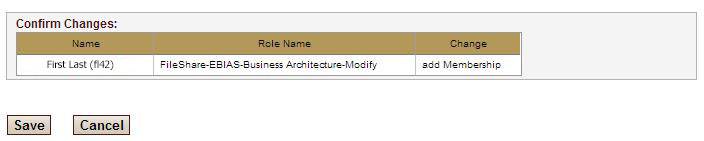
- You will need to confirm the changes before they will go into effect.
Click Save to make the changes, or Cancel to stop the process and return to the main Role Management page.
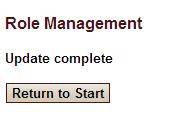
- You will have a confirmation of all changes. Click Return to Start to return to the User Search result page
Confirming Changes
When looking at the User's roles, you will not see the new assignment unless you have added an End date.
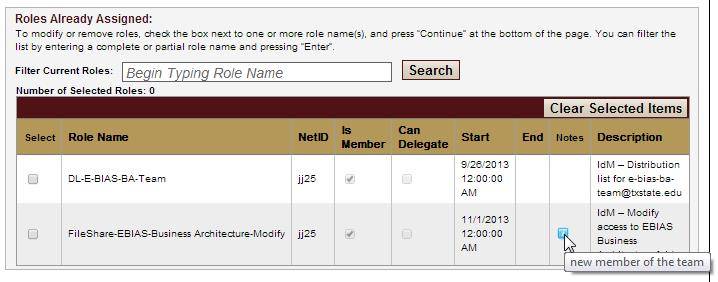
NOTE: Hovering over the icon in Notes will show the text entered in the notes section when first adding the user.